I’ve baked, built, and beautified gingerbread houses for years, but creating my first vegan version opened up an entirely new world of architectural confectionery. The traditional recipe, with its eggs and butter, has long excluded those following a plant-based lifestyle from this cherished holiday tradition. Through careful experimentation with ingredients like aquafaba and coconut oil, I’ve developed a construction-worthy gingerbread that’s every bit as sturdy and flavorful as its conventional counterpart.
Let me share how this animal-friendly adaptation has transformed my annual house-building ritual into an inclusive celebration that welcomes everyone to the table.
Recipe
A vegan gingerbread house captures the essence of holiday traditions while remaining entirely plant-based. This architectural confection serves as both a festive decoration and a delightful project that brings families together during the winter season, filling the home with warming aromas of ginger and spice.
Creating a sturdy vegan gingerbread house requires precise measurements and attention to texture. The combination of molasses and coconut oil provides the perfect structure, while aquafaba-based royal icing acts as a reliable cement to hold the walls and roof together, ensuring your creation stands proud throughout the holiday season.
- 3 cups all-purpose flour
- 2/3 cup dark brown sugar
- 1 tablespoon ground ginger
- 2 teaspoons ground cinnamon
- 1/2 teaspoon ground nutmeg
- 1/2 teaspoon baking soda
- 1/2 teaspoon salt
- 2/3 cup molasses
- 1/3 cup melted coconut oil
- 1/4 cup plant-based milk
- 2 cups powdered sugar
- 3 tablespoons aquafaba
- 1/2 teaspoon vanilla extract
In a large bowl, whisk together flour, brown sugar, ginger, cinnamon, nutmeg, baking soda, and salt. In a separate bowl, combine molasses, melted coconut oil, and plant-based milk.
Add wet ingredients to dry ingredients and mix until a firm dough forms. Chill for 30 minutes, then roll out to 1/4 inch thickness. Cut house pieces using templates and bake at 350°F for 12-15 minutes.
While pieces cool, prepare royal icing by beating aquafaba, powdered sugar, and vanilla until stiff peaks form. Assemble house by piping icing along edges and holding pieces together until set, then decorate as desired.
For best results, ensure all ingredients are at room temperature except the coconut oil, which should be just melted but not hot. Allow each joined section to dry completely for at least 1 hour before adding the next piece.
If working in a humid environment, consider running a dehumidifier in your kitchen during assembly. Store the finished house away from direct sunlight and moisture, and reinforce any structural weak points with additional royal icing as needed.
Step-By-Step Cooking Instructions
You’ll want to begin by thoroughly mixing and sifting your dry ingredients in one bowl while combining the wet ingredients in another, ensuring everything is well incorporated.
Next, you’ll need to knead the combined mixture into a firm dough before rolling it out to precisely 1/4 inch thickness and cutting your house panels using templates.
After carefully transferring the cut pieces to parchment-lined baking sheets, you’ll bake them until golden brown and let them cool completely before assembly.
Step 1. Mix and Sift Dry Ingredients

Begin your gingerbread house journey by gathering three mixing bowls – one large and two medium.
In the large bowl, you’ll start by measuring out your 3 cups of all-purpose flour, ensuring you level each cup with the straight edge of a knife for accuracy. Add 2/3 cup of dark brown sugar, making sure to break up any lumps with your fingers.
Now, it’s time to incorporate your aromatic spices. Measure out 1 tablespoon of ground ginger, 2 teaspoons of ground cinnamon, and 1/2 teaspoon of ground nutmeg. Add these warming spices to your flour mixture, followed by 1/2 teaspoon of baking soda and 1/2 teaspoon of salt.
You’ll want to ensure even distribution of all these dry ingredients. Take a wire whisk and sift the mixture thoroughly, paying special attention to break up any clumps of brown sugar or spices that might remain.
Continue whisking for about two minutes, until you’ve achieved a uniform color throughout the bowl. This thorough mixing process is crucial for ensuring your gingerbread panels will bake evenly and have consistent flavor in every bite.
Step 2. Combine Wet Ingredients Together

Moving to the wet ingredients, take one of your medium mixing bowls and pour in 2/3 cup of molasses, letting its rich amber color pool at the bottom.
Next, measure 1/3 cup of coconut oil, ensuring it’s completely melted but not too hot, and add it to the molasses. The warm oil will help the mixture blend more smoothly, creating a silky consistency that’s essential for your gingerbread dough.
Add 1/4 cup of your chosen plant-based milk to the bowl. Almond milk works particularly well, though any non-dairy milk will suffice.
Using a whisk, blend these three wet ingredients together with gentle, deliberate strokes until they’re fully incorporated. You’ll notice the mixture becoming uniform in color and taking on a glossy sheen.
As you whisk, you’ll want to achieve a consistency that’s neither too thin nor too thick – it should ribbon slightly when lifted with the whisk.
If your coconut oil starts to solidify during mixing, simply place the bowl over a warm water bath for a few moments. The finished wet mixture should be completely smooth and ready to combine with your dry ingredients.
Step 3. Knead Dough Until Firm

Now that your wet ingredients are perfectly combined, pour the glistening mixture into the bowl of dry ingredients. Using a sturdy wooden spoon, stir everything together until you’ve created a shaggy, fragrant mass. You’ll notice the molasses and spices releasing their warm, holiday aromas as you work.
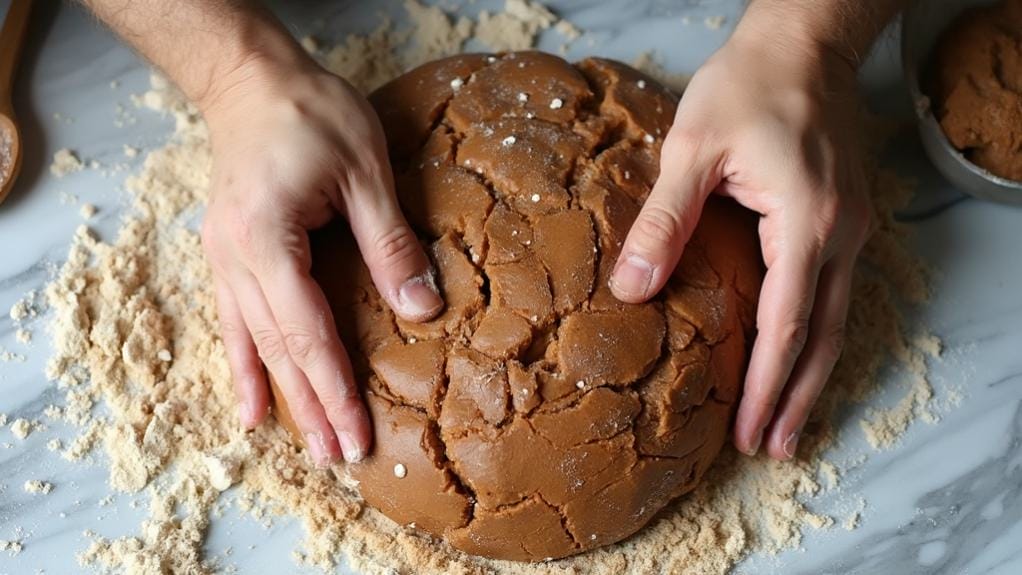
Turn the dough onto a lightly floured surface and begin kneading with purpose.
Press the heel of your hand into the dough, fold it over, then give it a quarter turn. Continue this rhythmic motion for about 5-7 minutes, until you’ve achieved a firm, smooth consistency. The dough should feel pliable but not sticky – if it’s too wet, dust with small amounts of flour; if too dry, add a few drops of plant-based milk.
Test the dough’s readiness by gently pressing your finger into it – it should spring back slightly while holding the indentation. Once you’ve reached this perfect consistency, shape the dough into a neat ball.
Wrap it tightly in plastic wrap or a reusable silicone cover, then let it rest for 30 minutes at cool room temperature before rolling.
Step 4. Roll and Cut Pieces

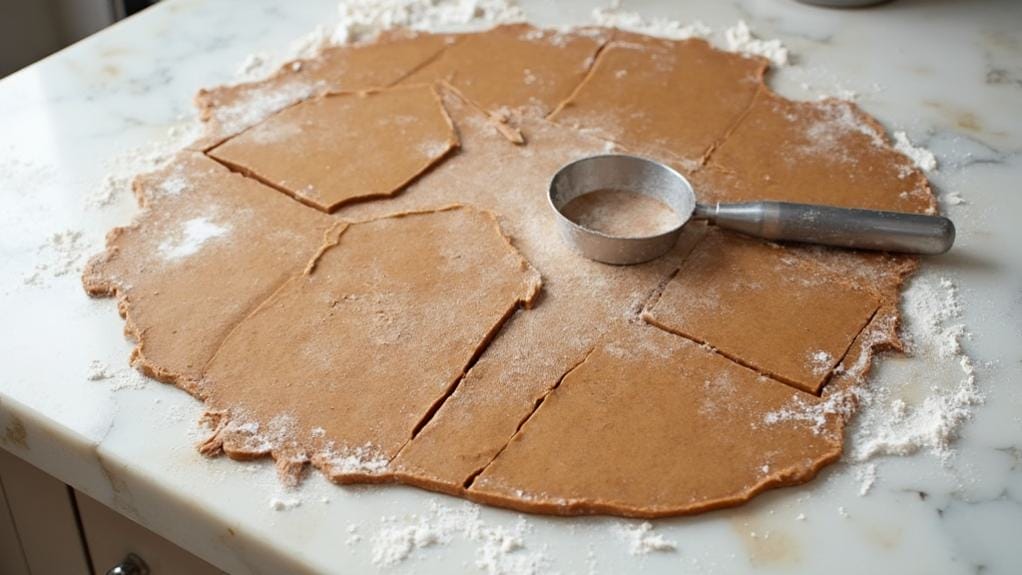
Ready to transform your rested dough into the building blocks of your gingerbread house? Begin by lightly flouring your work surface and rolling pin. Place your dough in the center and roll it out to a uniform 1/4-inch thickness, working from the middle outward in all directions.
You’ll want to maintain an even pressure to ensure consistent thickness throughout.
Position your house templates on the rolled dough, leaving about an inch of space between pieces. You’ll need two each of side walls, end walls, and roof panels. Using a sharp knife or pizza cutter, carefully cut around each template.
Remove the excess dough and set it aside for re-rolling. Gently slide a thin spatula underneath each piece to ensure they’re not sticking to the surface.
Transfer your cut pieces to parchment-lined baking sheets, leaving at least an inch of space between them to allow for slight spreading during baking.
Before moving them to the oven, double-check your measurements against your templates – it’s much easier to make adjustments now than after baking.
Use remaining dough to cut out decorative elements like doors, windows, or shutters.
Step 5. Bake and Cool Panels

The warmth of your preheated 350°F oven welcomes your carefully cut gingerbread panels as they begin their transformation into sturdy building materials.
Place your pieces on parchment-lined baking sheets, leaving at least 1 inch of space between each panel to ensure even baking and prevent them from fusing together.
Slide your trays into the oven, positioning them in the center rack for optimal heat distribution.
You’ll need to watch the panels carefully during their 12-15 minute baking time – they’re done when the edges are slightly darker and the centers feel firm but not hard.
Don’t let them brown too much, as they’ll continue to harden as they cool.
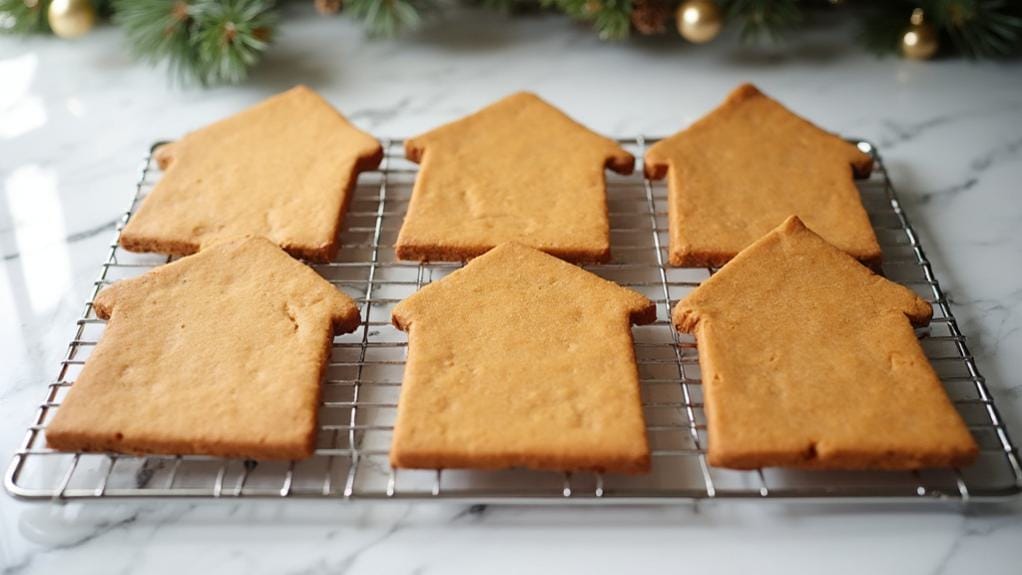
Once baked, let the panels rest on the baking sheets for 5 minutes before transferring them to cooling racks.
They’ll need at least 30 minutes to cool completely and reach their full structural strength.
If you’re working in batches, make sure your baking sheets have returned to room temperature before placing new dough on them.
Test each panel’s readiness by gently pressing the center – it should feel completely firm and cool to the touch.
Why I Love This Dish
Throughout my years of holiday baking, I’ve found few projects more enchanting than crafting a vegan gingerbread house. I love how this plant-based version captures all the magic of the traditional recipe while allowing everyone at my holiday gatherings to participate, regardless of their dietary choices.
What truly captivates me is the meditative process of assembly. I carefully pipe the royal icing, watching as each panel comes together to form a miniature architectural marvel. The warm, spicy aroma of ginger and cinnamon that fills my kitchen brings me right back to my childhood memories of holiday baking, yet I’m creating new traditions with this compassionate adaptation.
I’m particularly drawn to the creative freedom this project offers. Each house becomes a unique expression of my artistic vision, from the delicate icing lattice work to the carefully placed vegan candies.
There’s something deeply satisfying about transforming simple ingredients like flour, molasses, and coconut oil into a charming holiday centerpiece. Best of all, I can share this joy with my vegan friends and family, knowing they can fully participate in this beloved holiday tradition.

Leave a Reply