I’ve discovered that the art of crafting no-bake peanut butter balls demands a meticulous attention to detail that elevates this simple treat into something extraordinary. While many consider these confections merely a nostalgic indulgence, I’ve refined the process to achieve the perfect balance of texture and flavor through precise measurements and carefully selected ingredients.
The transformation of basic pantry staples into elegant, chocolate-enrobed spheres isn’t just about following steps—it’s about understanding the subtle nuances that distinguish an average treat from an exceptional one. Let me show you how to master this sophisticated yet approachable creation.
Recipe
No-bake peanut butter balls are delicious vegan treats that combine the smooth richness of natural peanut butter with the natural sweetness of maple syrup. These bite-sized desserts offer a perfect balance of flavors and textures, featuring crushed graham crackers and a dark chocolate coating that creates an irresistible plant-based confection.
These easy-to-make treats require no oven time, making them perfect for warm weather or when you want a quick dessert solution. They’re ideal for holiday gatherings, party platters, or simply keeping in the refrigerator as a sweet snack option that satisfies both chocolate and peanut butter cravings while maintaining vegan principles.
- 2 cups natural peanut butter
- 1/2 cup maple syrup
- 1 cup almond flour
- 1 cup crushed vegan graham crackers
- 1/2 teaspoon vanilla extract
- 1/4 teaspoon sea salt
- 1 cup dairy-free dark chocolate chips
- 1 tablespoon coconut oil
In a large mixing bowl, combine peanut butter and maple syrup until smooth and well incorporated. Add almond flour, crushed graham crackers, vanilla extract, and sea salt, mixing thoroughly until a uniform dough forms.
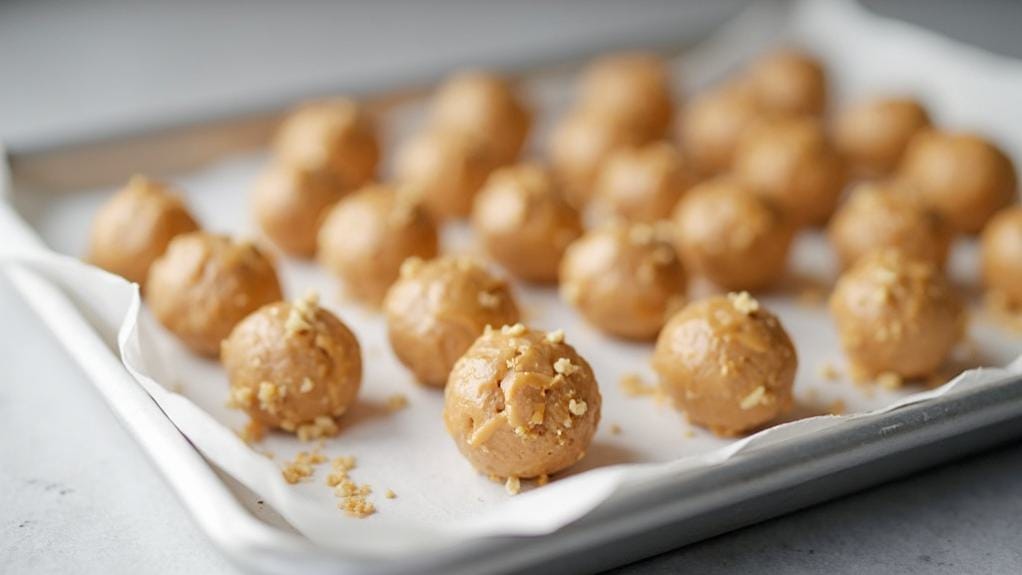
Shape the mixture into 1-inch balls and place on a parchment-lined baking sheet. Freeze for 15 minutes to set. While balls are freezing, melt chocolate chips and coconut oil together using a double boiler or microwave in 30-second intervals.
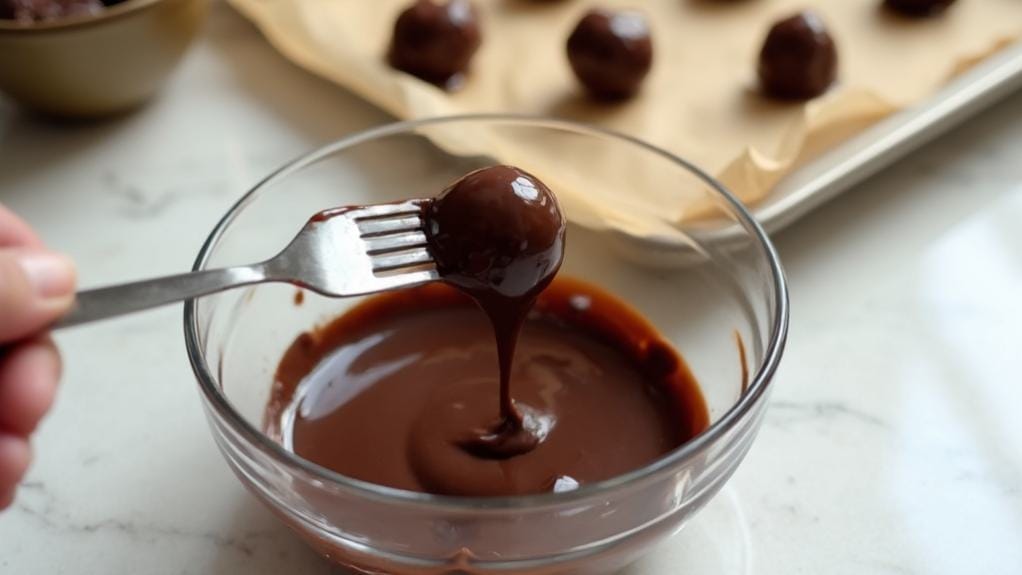
Dip each chilled ball in the melted chocolate mixture, place back on the parchment paper, and refrigerate for 30 minutes until the chocolate coating has completely set.
For optimal results, chill the mixture for 15-20 minutes if it becomes too sticky during rolling. Use a fork or toothpick when dipping the balls in chocolate to achieve a clean, professional appearance. Tap off excess chocolate gently against the bowl’s side before placing on parchment paper.
Store finished peanut butter balls in an airtight container in the refrigerator for up to two weeks, and allow them to sit at room temperature for 5-10 minutes before serving for the best texture and flavor profile.
Step-By-Step Cooking Instructions
You’ll begin your peanut butter ball creation by thoroughly combining the peanut butter and maple syrup in a large bowl.
Next, methodically incorporate the almond flour, graham crackers, vanilla, and salt until you’ve achieved a uniform mixture.
After that, you’ll shape the mixture into precise 1-inch spheres and place them in the freezer for 15 minutes to ensure proper firmness.
Finally, you’ll carefully dip each chilled ball into melted chocolate mixed with coconut oil, ensuring complete coverage before transferring them back to the parchment-lined baking sheet for setting.
Step 1. Mix Wet Ingredients Together

To begin this crucial first step, pour the natural peanut butter and maple syrup into a large mixing bowl, ensuring both ingredients are at room temperature for optimal blending.
You’ll need precisely 2 cups of natural peanut butter and 1/2 cup of maple syrup. Using a sturdy silicone spatula or wooden spoon, combine these ingredients with deliberate, thorough strokes until you achieve a completely uniform consistency.
Next, add the 1/2 teaspoon of vanilla extract, incorporating it evenly throughout the mixture. It’s essential to scrape down the sides of the bowl periodically to ensure no unmixed ingredients remain.
The final wet mixture should be smooth, glossy, and free of any streaks or separation. If you notice your peanut butter is particularly stiff or resistant to mixing, let it stand at room temperature for an additional 10-15 minutes before proceeding.
You’ll know the wet ingredients are properly combined when the mixture moves as one cohesive mass and has a slight sheen to its surface. At this stage, you’re ready to incorporate the dry ingredients.
Step 2. Add Dry Ingredients

Now that your wet ingredients are thoroughly combined, it’s time to incorporate the dry components with methodical precision.
Begin by measuring exactly one cup of almond flour, ensuring you’ve leveled it perfectly with a straight edge. Next, add the precisely crushed graham crackers, making certain they’re uniformly processed to a fine consistency. You’ll want to introduce the 1/4 teaspoon of sea salt at this stage as well.
Add these dry ingredients to your peanut butter-maple syrup mixture gradually, incorporating them in three equal portions. This methodical approach prevents clumping and ensures even distribution throughout the mixture.
Using a sturdy silicone spatula, fold each portion in with deliberate strokes, scraping the sides and bottom of the bowl thoroughly between additions. You’ll notice the mixture becoming progressively firmer and more manageable.
Continue mixing until you’ve achieved a uniform consistency with no visible streaks of flour or graham cracker remnants. The final texture should be cohesive and pliable, neither too wet nor too crumbly.
If needed, use clean hands for the final incorporation to ensure everything is perfectly combined.
Step 3. Roll Into Small Balls

After achieving the perfect dough consistency, rolling the mixture into uniform balls requires precision and attention to detail. Scoop approximately one tablespoon of the mixture using a measuring spoon or small cookie scoop to ensure consistency in size.
Roll each portion between your palms with firm, even pressure until you achieve a perfectly smooth, round shape measuring exactly one inch in diameter.
If you find the mixture’s sticking to your hands, refrigerate it for 15-20 minutes until it firms up slightly. You’ll want to work efficiently during this stage, as the mixture can become too soft at room temperature.
Place each completed ball onto a parchment-lined baking sheet, maintaining equal spacing between them to prevent any touching or sticking.
Once you’ve rolled all the mixture into balls, examine each one for uniformity. Any misshapen ones should be re-rolled to maintain professional presentation.
Count the total number of balls to ensure even chocolate coating later. Transfer the baking sheet to the freezer for precisely 15 minutes – this crucial step ensures the balls will hold their shape during the chocolate coating process.
Step 4. Freeze Balls Until Firm

The precision of freezing plays a vital role in achieving the perfect texture and shape retention of your peanut butter balls.
After rolling your mixture into uniform 1-inch spheres, place them carefully onto a parchment-lined baking sheet, ensuring they don’t touch one another. You’ll want to arrange them with at least half an inch of space between each ball to prevent any sticking during the freezing process.
Transfer your baking sheet directly to the freezer and set a timer for exactly 15 minutes. This specific duration is crucial – it’s long enough to firm up the balls so they’ll hold their shape during chocolate coating, but not so long that they’ll become too hard to work with.
Don’t exceed the 15-minute mark, as overfreezing can cause condensation issues when dipping in chocolate. You’ll know they’re ready when the exterior feels firm to a gentle touch, but not completely frozen solid.
If you’re working in batches, keep the remaining balls refrigerated at 40°F (4°C) until you’re ready to proceed with the chocolate coating step.
Step 5. Dip in Melted Chocolate

With your perfectly chilled peanut butter balls ready, proper chocolate melting technique becomes your next focus. Combine your dairy-free dark chocolate chips and coconut oil in a microwave-safe bowl or double boiler. If using a microwave, heat in 30-second intervals, stirring between each cycle to prevent scorching. The optimal temperature for melted chocolate is 88-90°F, achieving a glossy sheen and smooth consistency.
Insert a toothpick or dipping fork into each chilled peanut butter ball, then submerge it completely in the melted chocolate. Gently tap the utensil against the bowl’s edge to remove excess chocolate, ensuring an even coating.
You’ll want to work efficiently, as the temperature of the melted chocolate shouldn’t drop below 86°F for optimal coverage. Transfer each chocolate-coated ball back to your parchment-lined baking sheet, twisting the toothpick slightly as you withdraw it to avoid leaving a visible hole.
If you notice the chocolate beginning to thicken, reheat it briefly to maintain the ideal dipping consistency. Continue this process until all balls are coated, then immediately transfer the sheet to your refrigerator for setting.
Why I Love This Dish
Beyond mere convenience, I’ve grown deeply fond of these no-bake peanut butter balls for their irresistible combination of rich flavors and varying textures. The interplay between smooth peanut butter and crunchy graham crackers creates a sophisticated balance that elevates this treat beyond typical confections.
I’m particularly impressed by how the almond flour adds subtle depth while improving the structural integrity of each ball.
What I find most compelling is the versatility of these treats. I can adjust the sweetness by varying the maple syrup, experiment with different chocolate percentages for coating, or even add textural elements like crushed nuts. The fact that they’re vegan without compromising taste makes them perfect for sharing with friends who’ve dietary restrictions.
I appreciate how they maintain their quality in the refrigerator, allowing me to prepare them well in advance of gatherings.
The methodical process of rolling, dipping, and decorating each ball appeals to my perfectionist nature, while the end result consistently garners praise from even the most discerning palates.
They’ve become my signature contribution to social gatherings, and I take pride in their polished presentation.

Leave a Reply