I’ve discovered that stuffed portobello mushrooms represent the perfect intersection of rustic comfort and refined cuisine. As a devoted home chef, I’m particularly drawn to their versatility – these elegant fungi serve equally well as appetizers at sophisticated gatherings or as satisfying main courses for intimate dinners.
The earthy depth of portobellos creates an ideal canvas for countless filling variations, from classic Mediterranean combinations to innovative Asian-inspired medleys. While the basic preparation follows a straightforward path, I’ve uncovered several nuanced techniques that elevate this dish from merely good to absolutely memorable.
Recipe
A hearty vegan stuffed portobello mushroom dish transforms simple ingredients into a satisfying main course that delivers deep, umami flavors and varied textures. The combination of quinoa, vegetables, and mushrooms creates a protein-rich meal that showcases the natural meatiness of portobello caps.
The success of this recipe depends on properly preparing the mushroom caps and creating a well-seasoned filling. Pre-baking the caps ensures they release excess moisture, while a mixture of herbs and seasonings brings out the best in both the mushrooms and the quinoa-based stuffing.
- 4 large portobello mushroom caps
- 1 cup quinoa, uncooked
- 1 red bell pepper, diced
- 1 yellow onion, finely chopped
- 4 garlic cloves, minced
- 2 cups fresh spinach, chopped
- 1/2 cup panko breadcrumbs
- 3 tablespoons olive oil
- 2 tablespoons balsamic vinegar
- 1 teaspoon dried thyme
- 1 teaspoon dried oregano
- 1/2 teaspoon smoked paprika
- Salt and black pepper to taste
Preheat oven to 400°F. Cook quinoa according to package instructions. Remove stems and gills from mushrooms, brush with 2 tablespoons olive oil and balsamic vinegar, and pre-bake for 10 minutes.
Heat remaining oil in a pan, sauté onions and garlic until soft, add bell peppers and cook for 3 minutes. Stir in cooked quinoa, spinach, breadcrumbs, and seasonings. Fill each mushroom cap generously with the mixture, pressing down slightly. Return to oven and bake for 15-20 minutes until the top is golden brown.
For optimal results, select mushrooms that are firm and dry, with intact caps. Store unused filling in an airtight container for up to three days in the refrigerator.
If using frozen spinach, ensure it’s completely thawed and drained to prevent excess moisture. The breadcrumbs can be substituted with gluten-free alternatives like crushed nuts or gluten-free breadcrumbs to accommodate dietary restrictions.
Step-By-Step Cooking Instructions
You’ll begin by gently removing the stems and gills from your portobello caps, then brushing them with a mixture of olive oil and balsamic vinegar for the initial bake.
Next, you’ll prepare the filling by sautéing your vegetables until tender, combining them with the quinoa, breadcrumbs, and seasonings into a cohesive mixture.
Finally, you’ll stuff each pre-baked mushroom cap generously with your prepared filling and return them to the oven until they achieve a beautiful golden-brown crust.
Step 1. Remove Stems and Gills

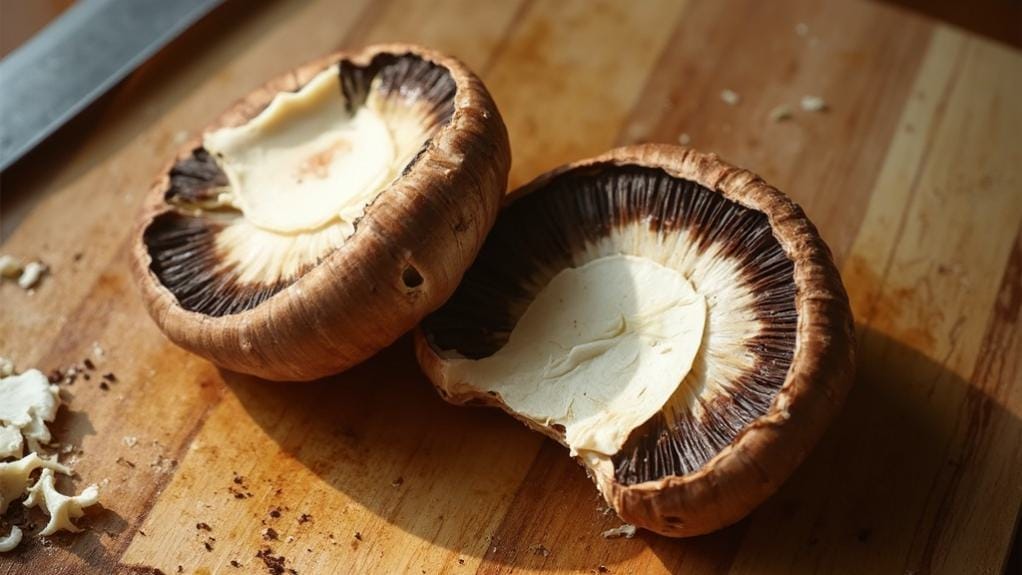
Before beginning the stuffing process, carefully remove the thick stems from each portobello mushroom by gently twisting and pulling them away from the caps.
You’ll want to grasp the stem firmly at its base while holding the cap securely in your other hand. The stem should separate cleanly with minimal force, though you can use a small paring knife if needed.
Next, you’ll need to remove the dark gills from the underside of each cap.
Using a small spoon, gently scrape away the gills in a circular motion, working from the center outward. Be thorough but careful not to damage the delicate flesh of the mushroom cap. The gills should come away easily, leaving a smooth, light-colored surface.
Once you’ve completed this process, use a damp paper towel to clean any remaining gill residue or debris from the caps.
This preparation technique creates more space for your filling while preventing the final dish from becoming discolored or mushy.
You’ll now have perfectly prepped mushroom caps ready for the next step in the recipe.
Step 2. Brush Caps With Oil Mixture

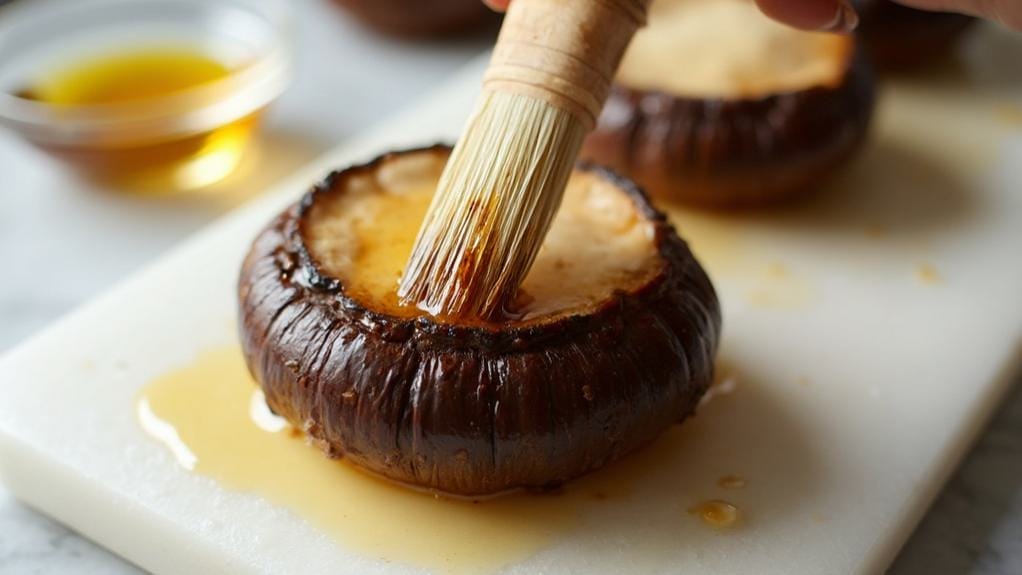
Preparing the mushroom caps with a flavorful oil mixture ensures both proper seasoning and optimal texture in the final dish. In a small bowl, combine two tablespoons of extra virgin olive oil with one tablespoon of balsamic vinegar, whisking until well incorporated. This mixture will create a rich, glossy coating that enhances the mushrooms’ natural umami flavors.
Using a silicone brush or pastry brush, generously coat both sides of each portobello cap, paying special attention to the gill side where you’ve created additional surface area. You’ll want to ensure every crevice receives an even application of the oil mixture, as this promotes uniform browning and prevents dry spots during baking.
Once you’ve brushed all surfaces, arrange the caps gill-side up on a lined baking sheet. The oil mixture won’t just add flavor – it’ll also create a protective barrier that helps the mushrooms retain moisture while allowing excess liquid to evaporate during the initial pre-baking phase.
This crucial step prevents your final stuffed mushrooms from becoming waterlogged while maintaining their meaty texture.
Step 3. Sauté Vegetables Until Soft

While the mushroom caps pre-bake in the oven, begin crafting the aromatic vegetable base for your filling.
Heat a tablespoon of olive oil in a large skillet over medium heat until it shimmers. Add your finely chopped onions first, allowing them to slowly release their natural sugars as they turn translucent and tender, approximately 3-4 minutes.
Once your onions have softened, introduce the minced garlic to the pan. Stir continuously for 30 seconds, just until the garlic becomes fragrant but doesn’t brown, as browning can create unwanted bitterness.
Next, add your diced red bell peppers to the mixture, maintaining medium heat as they gradually soften and develop a slight char on their edges, about 4-5 minutes.
Finally, incorporate the fresh chopped spinach into your sautéed mixture. You’ll notice the spinach beginning to wilt almost immediately; continue cooking just until it’s completely wilted but still maintains its vibrant green color, approximately 2 minutes.
Season the vegetable mixture with salt and black pepper, adjusting to your taste preferences. The vegetables should now be perfectly tender and ready to combine with your remaining filling ingredients.
Step 4. Mix Filling Together

The creation of a perfectly balanced filling requires a methodical combination of your prepared ingredients. In a large mixing bowl, transfer your sautéed onions, garlic, and bell peppers, ensuring they’ve cooled slightly to prevent wilting the fresh spinach you’ll add next.
Incorporate the pre-cooked quinoa, folding it gently into the vegetable mixture to maintain its delicate texture.
Add your chopped fresh spinach, allowing the residual heat from the other ingredients to slightly wilt the leaves. Sprinkle in the dried thyme and oregano, distributing them evenly throughout the mixture. Season with salt and black pepper, tasting as you go to achieve the perfect balance of flavors.
Finally, add the breadcrumbs gradually while stirring, as they’ll help bind the filling together and create a pleasing texture.
You’ll know your filling is properly mixed when all ingredients are evenly distributed and the mixture holds together when gently pressed. If it seems too dry, you can add a small drizzle of olive oil. If it’s too wet, incorporate additional breadcrumbs until you achieve the ideal consistency for stuffing your prepared mushroom caps.
Step 5. Bake Until Golden Brown

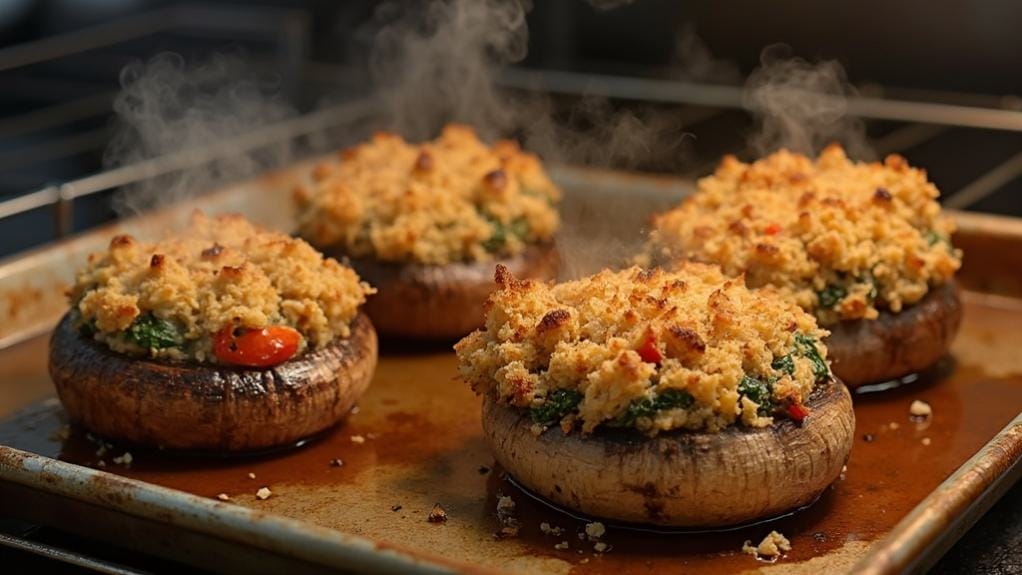
Once you’ve filled each portobello cap with your meticulously prepared mixture, position them carefully on a parchment-lined baking sheet, ensuring they’re evenly spaced to promote consistent browning.
Return the stuffed caps to your preheated 400°F oven, placing them on the middle rack for optimal heat distribution.
Watch for the telltale signs of perfect doneness over the next 15-20 minutes. You’ll notice the breadcrumbs taking on a rich, golden-brown hue, while the filling becomes thoroughly heated.
If you observe the tops browning too quickly, simply tent them with aluminum foil to prevent scorching while allowing the mushrooms to finish cooking.
Test the mushrooms’ doneness by inserting a knife into the thickest part of a cap; it should slide through with minimal resistance. The caps should appear tender yet maintain their structural integrity.
You’ll know they’re perfectly cooked when the filling is hot throughout and slightly crispy on top, while the mushroom itself remains juicy and succulent.
Remove from the oven and let rest for 3-5 minutes before serving to allow the flavors to settle.
Why I Love This Dish
As someone who’s prepared countless vegetarian dishes, I’ve found stuffed portobello mushrooms to be an unrivaled culinary masterpiece that combines elegance with rustic charm.
The versatility of these mushrooms never ceases to amaze me, as they readily absorb the flavors of herbs and seasonings while maintaining their own distinct, earthy character.
I’m particularly drawn to how these mushrooms transform humble ingredients into something extraordinary. The combination of quinoa, fresh vegetables, and aromatic herbs creates a filling that’s both nutritious and satisfying.
What I appreciate most is how the pre-baking technique ensures the perfect texture – tender yet firm mushrooms that hold their shape while complementing the crispy, golden-brown topping.
I’ve served these stuffed portobellos at numerous dinner parties, and they consistently impress both vegetarians and meat-eaters alike.
The presentation alone makes a statement, with each mushroom cap serving as an elegant, individual portion.
When I’m seeking a dish that offers sophistication without complexity, these stuffed portobellos are my trusted choice, delivering restaurant-quality results in my home kitchen.

Leave a Reply